3D Modelling / Exercises
29/8/2022 - 3/10/2022 / Week 1 - Week 6
Nurul Adlina Rizal / 0345429 / Bachelor of Design in Creative Media
3D Modelling
Exercises
JUMPLINKS
LECTURES
Week 1: Module Briefing
Week 2: Blender Tutorial
Blender User Interface
navigating the viewport
- middle mouse button
- click, hold, drag
- track view
- shift + middle mouse
- zoom in / out
- scroller
- ctrl + middle mouse button
maximize/minimize orthographic view (quad view)
Press N for the sidebar > quad view > unlock rotation
mouse hover over any orthographic view and press ctrl + alt + q to make it focus on one side of the view
transform object
x (red)
y (green)
z (blue)
MOVE
FREE
literally just drag it anywhere,,
AXIS DIRECTION
hover and click on either x,y,z arrow to lock it in its path
then drag it along the path :>
shortcut: G (grab)
make sure to select item first before pressing G
free transform
click either x,y,z to make it follow along the path
RESET
G + alt
ROTATE
same thing as move
shortcut key: R
SCALE
uniform
x,y,z
non-uniform
shortcut key: S
-will scale the whole thing uniformly
RESET
alt + S
TRANSFORM HIERARCHY
Using parent objects
Week 3: Blender Tutorial on Rendering
Viewport Shading and Rendering
- select object
- properties editor - material properties
- scroll down to viewport display (to change color)
viewport display attributes
2. metalic (non metallic > full metallic)
3. roughness (shiny material > nonshiny material )
Rename the material for easier to be identified (double click)
all created material will be stored here as a material library click and find the created shader
changing the camera angle and frame in camera view
- view from camera
- press N to bring up properties shelf
- go to view lock
- lock camera to view
- change the view as you do in perspective
- disable camera to view if you’re happy and dont want to change it
Display the rule of thirds line of the viewport
- select camera
- object properties
- click second from bottom
- composition guides
- thirds (enable)
Week 4:
Polygonal Modelling
- Array Modifier
original object and a series of duplicated objects from array modifier
setting: fit type = fixed count
count = set the number of duplication
you can add arrows to become new origins (just set it on the origin in the simple deform effect)
Note for Bend (Simple Deform)
- create plane
-
apply modifier
- subdivision
- simple deform
- set level viewport value (3)
- off optimal display
- ON wireframe display (under overlays)
Problem with simple deform bend
It only works on Z Axis.
X and Y have no influence.
How to solve this?
- Rotate the plane up 90 degrees on X, facing front side
-
Apply all transformations
- set all value to zero
- select object (plane)
- viewport menu > object > apply > all transformations
- Now, apply simple deform with bend, it should work in all axes
Put array on the curve
- apply array on the object
- set the count number
Apply curve modifier
- select object
- modifier > deform: curve
- create curve and put it as the curve object
Create curve
- viewport menu > add > curve > bezier
-
to manipulate the shape you need to access the edit mode by pressing TAB
- use curve point to position
- use curve handle to shape the curve
To extend curve point
- select curve point
- press E to extend it
- move to new curve point
To apply you need to select the curve object at curve modifier
(it should follow the curve direction
set the radius setting for the curve
- select curve
- access the edit mode
- select curve point > set the radius value
THE CURVE HAS TO BE AT THE SAME OG POINT AS THE CUBE !
Lattice
create cube
- apply subdivision modifier
- scale the cube to rectangle
- make sure the subdivision is enough
create lattice object
- viewport menu > add > lattice
(default shape for the lattice is a cube)
- scale and move the lattice to wrap around the object
add more subdivisions to the lattice
- select the lattice object
- properties editor (second from bottom - object data properties)
Week 5: Destructive Modelling
Polygonal Models
-
Non-Destructive
- Modifier
- History
-
Destructive
- Non-Modifier
- No-History
Poly-Gon
Poly = Many
Gon = Sides
Polygon Surface
4 sides - Quad
1 face - 3 sides - Triangle
‘N’ Gon - more than 4 sides
We need to subdivide to see the quality of the surface.
Low-Poly
- has limited amount of component
High Poly
‘LOD’ = Level of Detail
- using subdivide modifier
Modelling Process
Primitives
- sphere, cubes, cylinder, cone, pyramid
( add component - edge)
Week 6: Hard Surface Modelling
Planning for Symmetrical Modelling
Bodean
- Union (combine)
- Difference (removes the part chosen first)
- Intersection (only the ones that intersect)
- Slice (cuts the object)
Tool
- Modifier
- Add on
Edit > Preferences > Add-Ons > Bool Tool
object shape that will be cut out of a shape should extend a bit more than the one that need to be cut.
Eliminate the ‘N-Gon’
Select 2 opposite vertices
Viewport Menu > Vertex > Connect Vertex Path (J)
Step 2 (other than use Bool Tool)
Take a cylinder and inset, remove faces.
INSTRUCTIONS
Exercises
Week 1 (29/8/2022)
Week 2 (5/9/2022)

|
| Fig 1.1: Snowmen in Blender (5/9/2022) |

|
|
Fig 1.2: Table in Blender (5/9/2022) |
Week 3 (12/9/2022)
Exercise 1: Modelling from Primitive Objects
 |
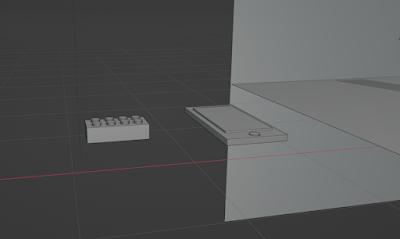
| Fig 1.4: Lego and iPhone (12/9/2022) |
 |
| Fig 1.5: Pink Flip Phone (12/9/2022) |
FINAL IMAGES

|
| Fig 1.6: Pink Flip Phone 3/4 View (18/9/2022) |

|
| Fig 1.7: Pink Flip Phone 3/4 View (18/9/2022) |

|
| Fig 1.8: Pink Flip Phone 3/4 View (18/9/2022) |

|
| Fig 1.9: Pink Flip Phone Front View (18/9/2022) |

|
| Fig 2.0: Pink Flip Phone Top View (18/9/2022) |
Week 4 (19/9/2022)

|
| Fig 2.1: Curved Block (19/9/2022) |
Making a tail from an array of cubes and controlling the radius of the bezier curve to making it smaller on the ends.

|
| Fig 2.2: Snake Head (19/9/2022) |
Created a snake head using a lattice on a cube.
Exercise 2: Non-Destructive Modeling

|
| Fig 2.3: Sketch (24/9/2022) |
I had used an array modifier on a cube and then put on the curve modifier for the tail. The head is a cuboid using a lattice to sculpt it.
FINAL IMAGES

|
| Fig 2.4: Snake 3/4 view (24/9/2022) |

|
| Fig 2.5: Snake Side View (24/9/2022) |

|
| Fig 2.6: Snake Side View (24/9/2022) |

|
| Fig 2.7: Top View (24/9/2022) |
Exercise 3: Polygonal Modelling
Week 5 (26/9/2022)

|
| Fig 2.8: Coke Bottle without shade smooth (1/10/2022) |

|
| Fig 2.9: Coke Bottle with reference (1/10/2022) |

|
| Fig 3.0: Coke Bottle with wireframes on (1/10/2022) |
References used:

|
| Fig 3.1: Coca-Cola Glass Reference (2/10/2022) |

|
| Fig 3.2: Coca-Cola Paper Cup Reference (2/10/2022) |

|
| Fig 3.3: Sprite Glass Bottle Reference (2/10/2022) |

|
| Fig 3.4: Coca-Cola Tin Can Reference (2/10/2022) |
Camera Angles

|
| Fig 3.5: Front (1/10/2022) |

|
| Fig 3.6: Left Side View (1/10/2022) |

|
| Fig 3.7: 3/4 Perspective View (1/10/2022) |

|
| Fig 3.8: Right Side View (1/10/2022) |

|
| Fig 3.9: Closeup (1/10/2022) |

|
| Fig 4.0: Top (1/10/2022) |

|
| Fig 4.1: Closeup 2 (1/10/2022) |

|
| Fig 4.2: Top View with Shadow (1/10/2022) |

|
| Fig 4.3: Front view with shadow (1/10/2022) |
FINAL

|
| Fig 4.4: Left side with shadow (1/10/2022) |
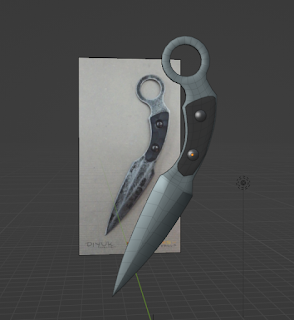
Exercise 4: Modelling a Karambit
Week 6 (3/10/2022)

|
| Fig 4.9: Front View (3/10/2022) |

|
| Fig 5.0: Back View (3/10/2022) |

|
| Fig 5.1: Perspective View (3/10/2022) |


Comments
Post a Comment